
How to Build a Giraffe with Wine Corks
My name is Art Maw and Jerome is the name I gave a 6′ 2″ giraffe (made to scale) I created from various types of wood and then completely covered in wine corks.
Before considering this project, it may be a good idea to have your sanity checked. I broke myself in with two earlier projects, Handsome and Ducky, pictured below.
But if you are determined to continue, call everyone you know and ask them to send you all of their wine corks for the next two years.
It could take up to two years to build your Jerome if you have any kind of a life outside of building a giraffe and that is probably how long it will take you to gather up enough corks unless all your friends are a bunch of … ummm … wine lovers.

Figure 1: Jerome is shown with Handsome and Ducky
MATERIALS
All types of wood scraps are useful in building this project. Jerome’s basic frame/skeleton is made of ½” plywood put together in a manner to define the body, shoulders, legs, and head. The various pieces are fastened together with glue, wood bracing, gyprock screws and brads from a power nail gun. In most areas carpenters white glue was used however construction glue was used in high-stress areas and hot glue from a glue gun was used throughout. All of the corks were attached with a hot glue gun.
You will need about 1500 corks, preferably non- plastic. All types and sizes of corks are used including champagne and wine corks.

GETTING STARTED
SCALING
The first step is to decide how big you want your Jerome to be and then scale a picture of a real giraffe accordingly. My Jerome is about six foot two inches tall, the body is scaled/proportioned to match the height wanted.
I started with a picture of a real giraffe and scaled it to meet the size I wanted. Figure 2 is a copy of the picture I used.
An example of how to scale your Jerome is simple; If your picture is 6 inches tall and you want the end product to be 4 feet tall, you just multiply all the dimensions on the scaling picture by eight.
It is also a good idea to have numerous pictures showing different views of the head, ears, legs feet, etc. so you can see the subtle contours and muscle structure better. This makes it easier to determine the contours as you build, especially when you get to the part of putting on the corks. In many areas it is necessary, e.g. on the head, to put on an underneath layer of corks and contour that layer with a knife before putting on the final layer.
I spent a lot of time flushing out the muscle structure while still keeping the overall proportions reasonably accurate.
Look at lots of photos of the head & neck of giraffes to help determine the individual shape, relationship, and position of each of the head components of themselves and to each other when building and flushing out a Jerome.

FRAME/BONES/SKELETON
STRUCTURE
It is important to study the body structure to determine the slope of the back, position of the knees and all of the fundamental structural parts before putting together the bones. If the basic structure is not reasonably accurate the end result may resemble some yet to be discovered mythical animal.
Scraps of ½ inch plywood or any other similar material can be used for the basic frame/bones. The important thing to remember is, the bones have to support themselves, the rest of the structure and the outer hide (corks) therefore the frame has to be mechanically sound. It is almost impossible to go back and repair a joint in the frame after everything is completed.
Here in figure 4 is an example of a strong mechanical joint in the basic frame.

Section of the neck showing good mechanical joints.

To begin making the Frame/Bones draw the outline of the legs, body, and neck on your sheet material (plywood). Be sure to draw in the subtle little details, example knees, humps, and bumps.
The legs including the shoulders and haunches have each to be all from one piece of material for strength, whereas the body and neck can be assembled from two or three pieces overlapped, glued and screwed together. See figure 6 where A is one piece and B is another piece overlapped, glued and screwed to A.

Note: When I was building Jerome there was no thought of writing this, so no effort was made to clean up the shop.
Cut the pieces out with a band saw or jigsaw. Cut out one leg and then use that as the pattern for the opposite leg, that way you can end up with symmetrical legs on both sides.
It is important to splay the legs and have the front ones forward of perpendicular and back legs aft of perpendicular. If you don’t he will fall over once the neck and corks are installed. It may even be necessary to add some weight to the back end. I didn’t have to, but depending on the weight of the materials used in the neck and head it could be required.
Figures 7 & 8 show the bare bones of Jerome.

PUTTING THE BONES TOGETHER
Fasten the main parts of the legs to the body and get the assembly standing up before attaching the neck and remaining leg parts.
BONE STRUCTURE IN PROGRESS
Once you have your Jerome standing on all fours it is time to give him some feet/hooves.
To make the hooves pick a suitable piece of 2-inch stock depending on the size of the final sculpture 2X4 or 2X6, I used 2X6. Cut grooves in the board before cutting out the shape, to accept the legs, per Fig. 9 & 10.


BONES
Secondary Bone Structure
The secondary bones are the pieces that define the shape or bulk of Jerome e.g. shown in figures 8 and 15. Cut two pieces the same shape and size of each secondary bone, one for each side of the neck, body or legs, again to end up with a relatively symmetrical structure. Fasten the secondary bones securely to the main body etc. as previously shown in figures 4 and 5.
It is important to have secure secondary bones to glue and nail the slats on. In the instance of a transition from the body to the leg or from the neck to the body, a piece of ¾ inch stock makes it easier to go from one slat to the next.
In some instances, the secondary bones may not be exactly the same from side to side depending on the positioning of the legs, for instance, if one leg is a little further forward of the opposite leg.
Slats
The slats are strips of Masonite, paneling or any other thin material that will bend enough to follow the contours of the bones to provide a base for the corks.
The slats on my Jerome are about 1 inch wide but can be any width depending on the size of your Jerome.
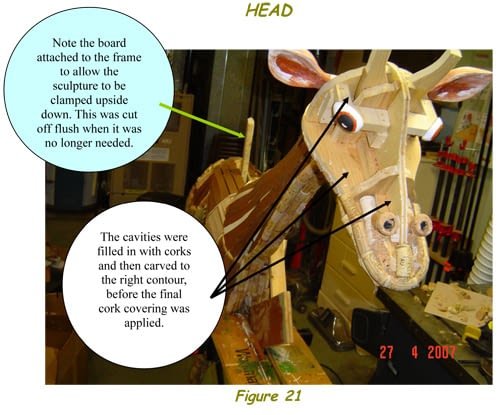
In some cases after covering the bones with slats, you will end up with cavities that do not lend themselves to being covered with slats. In these instances fill the cavity by gluing in corks and then shape them with a sharp knife to the contour of the area.

CORK COVERING
The outside covering is of corks cut in half lengthwise and glued to the slats with a hot glue gun. I found the best way to begin is to start at the feet and work up the legs to the belly. Turn the sculpture upside down securing it in place with clamps and complete the underside belly before going on.
The corks should be applied in a definite orientation generally in the direction the hair grows on a real giraffe.
Hint: Cut a pile of corks ahead of time. This will allow you the opportunity to select from various sizes, colours and a mixture of corks from different vineyards/cellars as you proceed, in order to add interest to the final product. I cut the corks with an Olfa retractable blade knife, but any sharp knife will do the job. The slats and cavities are filled with corks then contoured before final corks are applied. See figure 16.

Figure 17 Note the direction of the corks. We will come to the tail shortly.
Note: The board on the top of the back was screwed to the main frame to allow Jerome to be clamped upside down in order to work on the underside without doing any damage to the slats etc. Once it was no longer needed I cut it off flush with the frame and covered it with corks. See figure 21

TAIL
The tail is made by cutting the tops off Champagne corks and drilling a hole through the stem portion. The drilled pieces are threaded onto a length of sisal rope, with the end of the rope splayed and stained for colour. The assembly is stapled and glued to the frame and the last cork is glued to the rope. Finally, a piece of copper wire is threaded up through the holes in the corks to stiffen the tail up so it can be positioned (curled) in any manner.

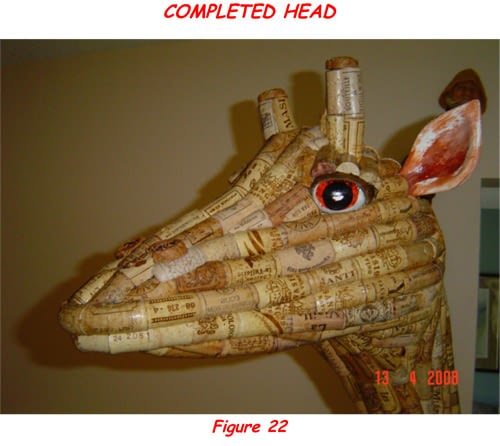
The Head
EARS
The ears are carved from a 2-inch thick piece of pine. I made a pattern of the shape and flipped it over to get the opposite ear. The general shape was cut out on a band saw, leaving a stub to attach the ear to the head and then carving the rest of the ear with various knives. I used craft acrylic paints for the colour.
NOSTRILS
The nostrils are made from the tops of Champagne corks with holes drilled in them and a little black paint smeared around the inside of the hole.

The Eyes
The eyes are wood half ovals available from craft stores, coloured with acrylic paint. The eyelids are a piece of leather but cork gasket material would work just as well. The eyelashes are cloth fringe from a sewing materials store.
FINAL FINISH
The final finish is two coats of BEHR water-based clear satin finish, but any clear coat (varnish) will work just as well.
Have fun and let us know how you do!
Below are a couple of photos of some of my other wine cork projects:
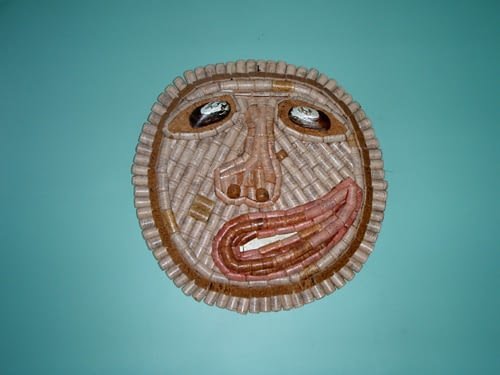
This mask hangs on a wall.
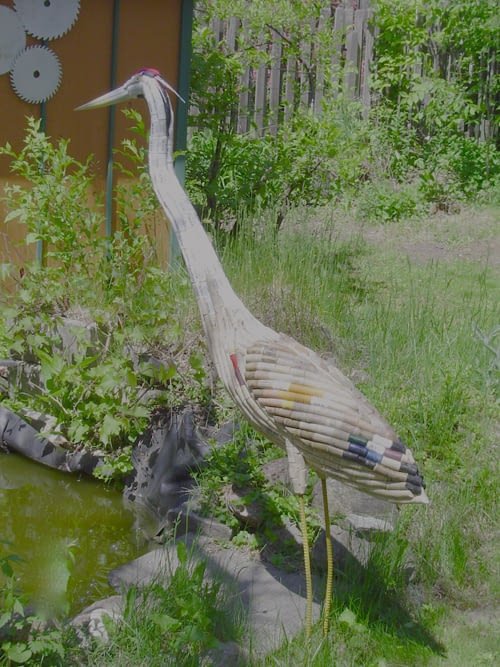
This is “Big Bird”. It is made with plastic corks so that it can stay outside in the summer. I have since added some feathers I found to the back tail.
Acknowledgments
My darling wife Lawrie for her patience and encouragement. All my drunken friends for supplying such a variety and quantity of corks. My good friend David Laister for his superb editing skills
Copyright © Arthur A Maw